

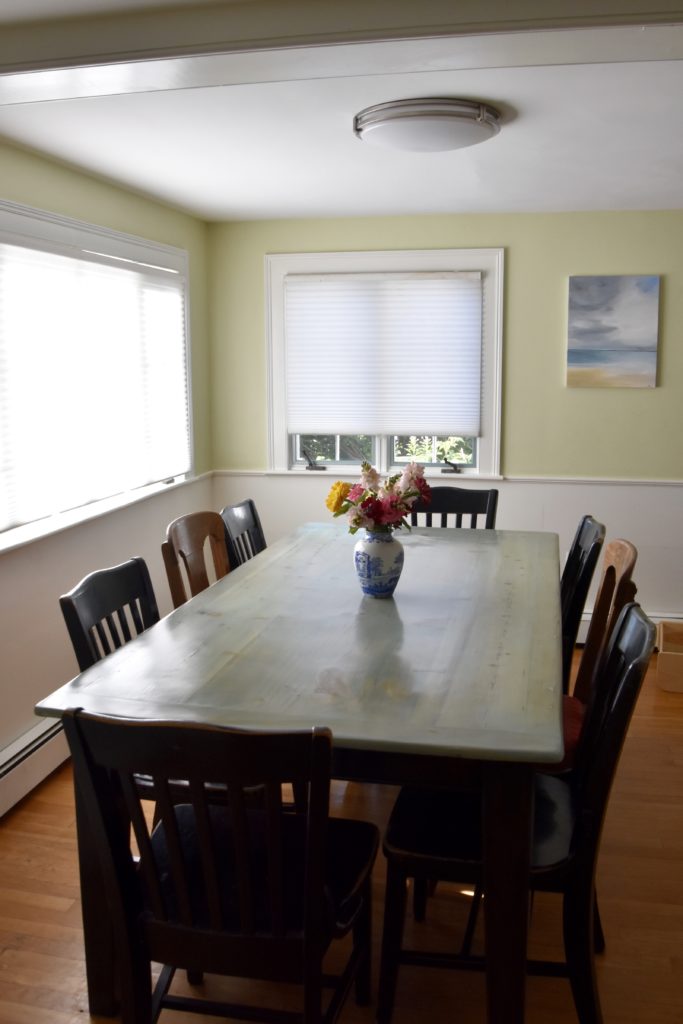
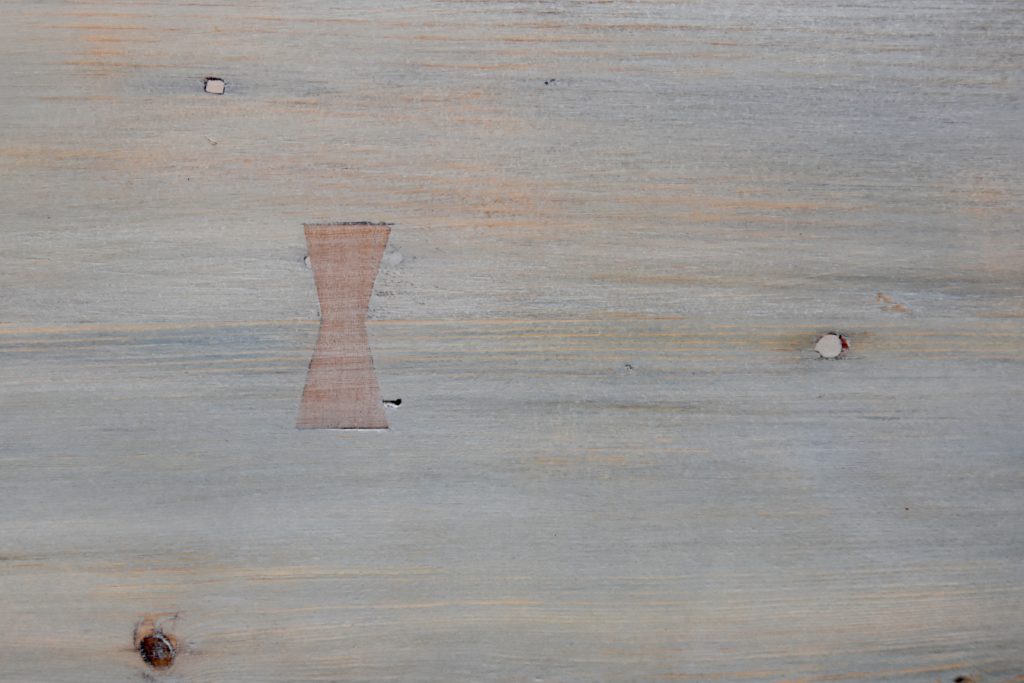
My kitchen table was driving me crazy. It has a pine top and is made from old barn wood, with super wide planks. The problem is, my dog chewed on it. Not the leg, but the actual top of the table. When she was a puppy, she pretty much destroyed everything, but I really couldn’t believe that she attacked the table. What dog does this?
You might not know this, but I used to be a furniture maker. In fact, I once had a goal of making everything I use in my home – silverware, dishes and bowls, glass, chairs, etc. I learned how to weld, make pottery, solder jewelry, and use hand tools to make dovetails. Lately I’ve gotten back into painting, and have produced a ton of work over the last few months. In the summer, I tend to take on big projects around the house. Last year, I “konmarrie’d” my whole house. Refinishing the table was next on the list.
So, if you are hating a particular piece of wood furniture, follow what I did instead of going out to IKEA and buying a brand new “Made in China” table…
First, move the furniture to a covered area outside the house. This could be a garage or barn, or maybe in your basement. You’re going to kick up a ton of dust, so don’t do this in your kitchen. Next, borrow an orbital sander from someone. You’ll need an extension cord, lots of sandpaper discs, and a really good dust mask or respirator. DO NOT BREATHE IN THE DUST. This stuff is super bad for your lungs.
Depending on how many layers of paint or urethane are on your table, this may take a while. Be patient. If you have a kid that is interested in helping, employ them! Sanding down the surface of the table took me the better part of a day. I decided to fully sand down the top to raw wood, and simply scuff up the legs so that they would take some stain. It would have taken a lot longer to fully sand down the legs to bare wood, and I thought the end product would look great with dark legs anyway, so this saved me another full day of work. I started with 80 grit, then worked my way up to 120 grit on the orbital sander. I finished with hand sanding to remove the marks from the circular marks from the orbital sander. The higher the number on the sandpaper, the finer. Always go from small numbers to big numbers.
Next, I went to the paint store. The local hardware store told me they don’t carry oil based paint, so you’ll need to call ahead to make sure they sell what you need. I bought the following:
- Stainable wood filler
- 1 Quart of Benjamin Moore oil based, low lustre paint (Wetherburn’s Blue, CW-580)
- 1 small container Old Masters gel stain (spanish oak)
- 1 quart Old Masters Polyurethane, water-based, semi-gloss finish
- 1 quart odorless paint thinner
- 2 brushes, one for the paint and stain, another for the urethane
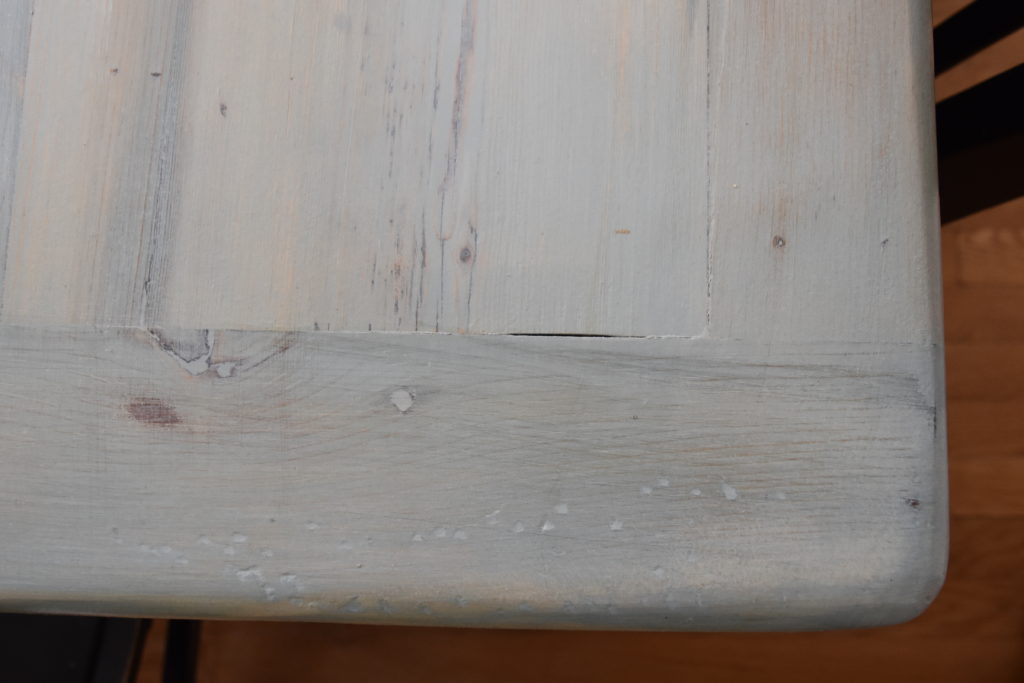
I filled all the dog tooth holes with wood filler. I did this by just dipping my finger into the wood filler and rubbing the filler in. I filled any other holes in the table (old wood, lots of holes) and after about 30 min, it was dry enough to sand smooth (not with the orbital sander, I used sandpaper). I then used an old t-shirt to wipe the whole table clean of dust. Next, I mixed a 50/50 solution of the blue paint with the paint thinner into a small bucket. I applied a coat of the paint. I was looking for a blue “stain” for the table, which is why I mixed it with the thinner. If you want a solid color, no need to mix. I waited one full day for the coat of paint to dry and lightly hand sanded before I did a second coat.
I took a look at the second coat and felt it was a bit “too blue”, so I lightly sanded the top to expose a bit of the wood. I thinned some oil-based Navajo White with the paint thinner and applied a light coat on the top. This gave a really nice “milky” quality to the top that I was hoping for. I applied one more thin coat of the blue and was feeling great about the top. I sanded lightly between each coat.
I then applied two coats of the gel stain on the legs. I went with a gel stain because it works better on wood that already has a finish on it. The previous finish had a reddish hue that I didn’t love, so the “spanish oak” worked better, as it’s more of an ebony. After a couple of hot and sticky days, the gel was dry enough to sand lightly, to expose the corners of the legs.
Once the whole table was dry, I lightly sanded to smooth the wood before applying the polyurethane. The reason I went with water-based is because an oil-based urethane will yellow in time, which is not a look I’m going for. It’s also much easier to clean the brush after using a water-based product. I allowed one full day between coats, sanded between coats, and ended up applying four coats of urethane to the top, 2 coats to the legs. After three full days of drying, I brought the table inside.
I think a variety of colors or stains would have looked really good. You can do a white wash with simply using thinned white paint. So, next time you’re feeling like you need a change, don’t go buy something new, just refinish what you have!


1 thought on “How to Refinish Your Kitchen Table”
Pingback: [BLOCKED BY STBV] How to Refinish Your Kitchen Table | Primal Docs